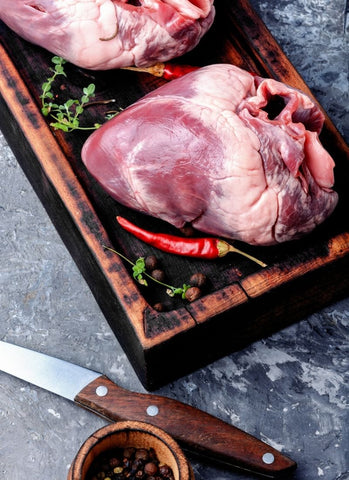

Trim Your Meat Like a Pro
The perfect steak requires not only the best cooking method, such as using our magic meat machine the Cinder Grill, but also a little attention. No matter where you source your meat -- hunting, a farm, a retailer -- most servings benefit from that last bit of trimming before you cook them. This allows you to control the fat content and form factor of your meat for optimum cooking and nutrition. Here's a brief guide to trimming and portioning your meat.
Gather Tools Like a Pro
Here's a brief list of what you'll need:
- A boning or paring knife -- a boning knife is better because it's longer and flexible, allowing greater control. Make sure the knife is as sharp as possible.
- A ruler to help with even thickness. Metal is best.
- A cutting board to use as a work surface.
- A non-slip liner under the cutting board -- this is imperative. A wiggly cutting board can result in injuries. A damp paper towel can be a good nonstick liner in a pinch.
- A scraps receptacle -- we'll find uses for those scraps!
- A tray for the finished meat -- piling it on the side of the cutting board reduces the available work area and can result in pieces falling and becoming contaminated.
- Paper towels, just in case.
- Kitchen safe gloves if desired.
- Last but not least: your meat, as cold as possible. Try lightly freezing it for 10 minutes, to firm it up.
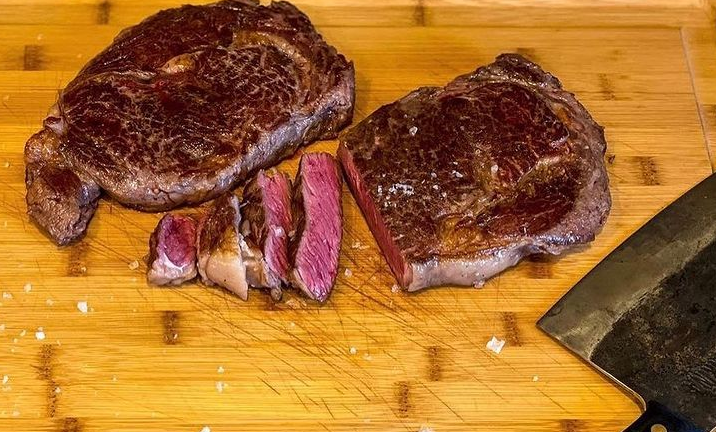
Trim Fat for the Perfect Steak
Take your piece of meat, pat it dry, and put it on your cutting board. Take your knife in a comfortable grip, sight a piece of fat, and angle the knife so it will lie almost flat on the meat's surface. Your goal is to slide the knife along the meat's new surface, under the majority of the fat. Use long strokes and remove the
fat in thin slices -- your aim is to avoid trimming away meat. Don't be afraid to go over the same spot more than once to shave away a big chunk of fat, and work slowly. Precision is the sign of cooking like a pro.
Also remember you don't have to remove all the fat! Some fat provides flavor and carries fat-soluble nutrients, as well as providing energy. You simply don't want too much, especially for sous vide cooking. This is because fat tends to soften more slowly than meat at sous vide temperatures, even in our magic meat machine. Trimming makes for a thin even layer that’s ideal for the perfect steak.
Strip Away the Silver Skin
Meat also contains connective tissue, especially around bones. You should remove connective tissue more aggressively than you do fat. Connective tissue only toughens and becomes unpleasant, even in our magic meat machine. In boneless meat, the most common form of connective tissue is silver skin. This comes in broad, thin bands which often have a silvery or blue tint. These bands tend to wrap around or lie alongside the surfaces of muscles.
To trim away the silver skin, set your knife perpendicular to its end, flat along the meat as before. Again, your goal is to slide the knife along the new surface of the meat. Slide your knife up under the end to create a tab. Holding that tab firmly, pull to keep it straight as you slide the knife along its length, removing
as little meat as possible along with it. (Like peeling an apple, losing some of the flesh will happen.) Don't worry about doing this several times to remove a particularly broad piece of silver skin. The goal is to keep the meat in one piece for a perfect steak, not to get a perfect sheath of silver skin.
Cuts for the Magic Meat Machine
If after trimming you intend to slice the meat into steaks, this is the time for your ruler. Use it as a guide for even, perfect steaks, all the same thickness. This will promote even cooking and maximum deliciousness. A metal ruler is the easiest to clean. The knife you'll need is longer than a paring knife. The boning
knife will do, or switch to a long slicing blade. Use long sweeping motions, as few as possible, and transfer each steak to your resting tray as it's removed. Remember, don’t saw, slice! That's how to cut like a pro!
Using the Trimmings
All these trimmings have incredible culinary value, so don't waste them! Here are some ways to use them:
- Render the fat from the trimmings on your Cinder Grill, capturing it in the Drip Tray, and add it to your Carnivore Diet. (Discard the spent trimmings.)
- You can also render the fat in a frying pan. Add a few spoonfuls of water at the start and cook the fat until deeply browned and crisp. Remove the bits from the liquid fat, drain on paper towels, salt well, and use these as savory accents or garnishes on salads and plated dishes.
- Brown all the bits in a saucepan until deeply colored, and pour off the liquid fat. Then add stock and wine, reduce by half, then strain off and keep the liquid. This makes a flavorful base for a wide range of sauces. (Again, discard the used trimmings.)
- Make sure that the fat pieces are free of connective tissue. Then grind them up and add them to ground meat to increase its tenderness, richness, and savory depth.
There you have it, a brief guide to trimming meat. Being able to do a little trimming will help you get the most out of our magic meat machine, the Cinder Grill. It'll help you achieve the perfect steak. And it will make you look like a pro!
Never Overcook Again
Try this on Cinder Grill Today
Related Posts
Shrimp on the Cinder Grill
Grain bowls and the Cinder Grill